
Rinnai gas heaters are renowned for their reliability and efficiency. A.G.A.-certified models like RHFE-309FT offer superior performance when installed and operated correctly as per manuals.
Overview of Rinnai Gas Heaters
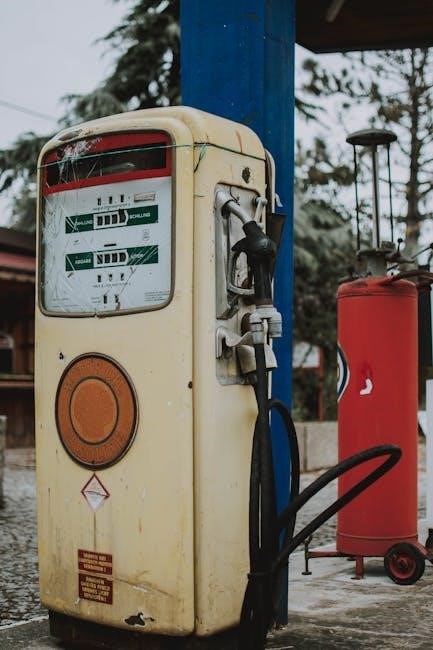
Rinnai gas heaters, including models like RHFE-309FT and RHFE-559FT, are A.G.A.-certified for safety and efficiency. Designed for reliable performance, they offer features like remote control operation, adjustable heat output, and energy-saving technology. These heaters are suitable for various spaces, ensuring consistent warmth with minimal energy consumption. Their durable construction and user-friendly designs make them a popular choice for both residential and commercial settings.
Importance of Proper Instructions
Proper instructions are crucial for safe and efficient operation of old Rinnai gas heaters. Adhering to installation and maintenance guidelines ensures optimal performance, safety, and energy efficiency. Incorrect installation or operation can lead to hazards like gas leaks or carbon monoxide risks. Always follow the manual to avoid potential dangers and maintain heater longevity. Professional installation is often required for complex models.
Installation Instructions
Old Rinnai gas heaters require precise installation by licensed professionals, following manual guidelines to ensure safety and efficiency. Verify gas type compatibility and adhere to local regulations for proper setup.
Step-by-Step Installation Guide
- Verify the heater is labeled for the correct gas type and compatible with local regulations.
- Mount the heater securely, ensuring proper clearance and ventilation.
- Connect gas lines by a licensed professional, following manual instructions.
- Install venting systems correctly to prevent carbon monoxide risks.
- Ensure electrical connections are safe and meet local codes.
- Test the heater to confirm proper operation and safety.
- Register the product and schedule regular maintenance.
Venting Requirements
Proper venting is crucial for safety and efficiency. Use approved venting materials and ensure correct sizing to avoid carbon monoxide risks. Maintain minimal bends and elbows in the venting system. Horizontal vents must slope upward, while vertical vents should extend above the roofline. Always follow local codes and manufacturer guidelines for installation. Annual inspections are recommended to ensure venting system integrity and performance;
Gas Line Installation
Gas line installation must be performed by a licensed professional. Ensure the line is sized correctly for the heater’s BTU rating. Use approved materials and secure connections to prevent leaks. Verify the gas type matches the heater’s specifications. Pressure-test the system before use. Always follow local codes and manufacturer guidelines to ensure safe and proper installation. Annual inspections are recommended to maintain safety and efficiency.
Electrical Connections
Electrical connections for old Rinnai gas heaters must be installed by a licensed electrician. Ensure the circuit matches the heater’s voltage and wattage requirements. Use appropriately sized wires and verify proper grounding. Test for voltage at the heater’s terminal block before connecting. Follow all safety guidelines and local electrical codes. Ensure the system is grounded correctly to prevent hazards and ensure reliable operation.
Operating the Heater
Turn on the heater using the remote or control panel, adjust heat output as needed, and monitor performance for safe and efficient operation.
Starting Up the Heater
Turn on the heater using the control panel or remote control, ensuring the gas type matches the label. Press the ON/OFF button to activate, and allow the unit to warm up. Always refer to the manual for detailed startup procedures and safety guidelines.
Adjusting Heat Output
Use the control panel or remote control to adjust the heat output. Models like RHFE-309FT offer variable settings to customize warmth. Refer to the manual for specific instructions on regulating the burner. Ensure the gas type matches the heater’s label for optimal performance and safety.
Using the Remote Control
Pair the remote control with your Rinnai gas heater by following the manual’s pairing instructions. Once connected, use the remote to turn the heater on/off and adjust settings. Models like Avenger 25 and Enduro 13 support remote operation. Ensure the remote control receiver is visible for proper signal reception. Refer to your specific model’s manual for detailed instructions on remote functionality.
Monitoring Heater Performance
Regularly monitor your Rinnai gas heater’s performance by checking the status display for error codes or alerts. Ensure proper ventilation and clean filters for optimal efficiency. Listen for unusual noises and check for consistent flame color. Refer to your manual for specific guidance on monitoring and interpreting performance indicators to maintain safe and efficient operation.
Shutting Down the Heater
To safely shut down your Rinnai gas heater, first turn off the remote control or press the power button on the control panel. Ensure the gas valve is turned to the “OFF” position. Allow the heater to cool completely before servicing. Always refer to your manual for specific shutdown procedures to avoid potential hazards and ensure proper operation.

Maintenance and Care
Regular cleaning of filters and vents ensures optimal performance. Replace worn parts promptly and schedule annual professional servicing to maintain efficiency and safety.
Cleaning the Heater
Regularly clean the filters and vents to ensure proper airflow and efficiency. Use a soft brush to remove dust and debris from the heater’s exterior and internal components. Check for blockages in the gas inlet and venting system. Refer to the manual for specific cleaning instructions to maintain safety and performance. Always turn off the heater before cleaning.
Replacing Filters
Replace filters every 6–12 months or as specified in the manual. Turn off the heater and ensure the replacement filter matches the model. Use genuine Rinnai parts for optimal performance. Regular filter replacement improves efficiency, reduces energy costs, and ensures safe operation. Refer to the manual for detailed steps and guidelines.
Inspecting for Wear and Tear
Regularly inspect the heater for signs of wear, such as damage to venting components, gas lines, or controls. Check for leaks, corrosion, or blockages in the system. Ensure all connections are secure and filters are clean. Look for unusual noises or reduced performance, which may indicate wear. Refer to the manual for specific inspection guidelines and address any issues promptly to maintain safety and efficiency.
Scheduling Professional Servicing
Regular professional servicing is essential for maintaining the performance and safety of your old Rinnai gas heater. Schedule annual inspections with a licensed technician to check for wear, ensure proper gas connections, and clean or replace components as needed. This helps prevent hazards, optimizes efficiency, and extends the heater’s lifespan. Always use Rinnai-authorized service providers for genuine parts and warranty compliance.
Troubleshooting Common Issues
Address issues like pilot light malfunctions, error codes, or no heat by checking gas lines, ensuring proper ventilation, and referring to the manual for diagnostic guidance.
Pilot Light Issues
Pilot light problems often occur due to drafts, blockages, or improper gas flow. Check for obstructions in the pilot tube and ensure the gas valve is fully open. If the pilot light won’t stay lit, verify the thermocouple connection and ensure proper ventilation. Refer to the manual for detailed troubleshooting steps or contact a licensed technician if issues persist.
Understanding Error Codes
Error codes on old Rinnai gas heaters, such as “11” or “12,” indicate specific issues like thermistor malfunctions or gas valve problems. Refer to the user manual for code definitions. Restarting the heater or checking connections often resolves issues. If errors persist, consult a licensed technician to ensure safety and proper repairs, as outlined in the manual guidelines.
Gas Leak Detection
Inspecting for gas leaks is crucial before and after installing your old Rinnai gas heater. Use soapy water or a leak detector solution on connections. Bubbles indicate leaks, which must be tightened or replaced. Always follow manual guidelines for safe detection and repair. Never operate the heater with suspected leaks to avoid safety hazards. Ensure all connections are secure and consult a professional if unsure.
No Heat Output
If your old Rinnai gas heater isn’t producing heat, check the pilot light and ensure it’s lit. Verify gas supply and inspect for leaks. Review error codes in the manual, as they may indicate issues like faulty sensors or blockages. Ensure proper ventilation and filter cleanliness. If problems persist, consult the user manual or contact a licensed technician for professional assistance to restore heating functionality safely.
Safety Precautions
Always ensure proper installation by a licensed professional and adhere to local gas authority guidelines. Check the heater’s gas type label and refer to manual instructions for safe operation and maintenance to avoid potential hazards.
Handling Gas Leaks
If a gas leak is suspected, immediately turn off the heater and open windows for ventilation. Avoid sparks or ignition sources. Do not attempt repairs yourself; contact a licensed professional to inspect and fix the issue. Regular maintenance and inspections can help prevent leaks, ensuring safe operation of your Rinnai gas heater.
Preventing Carbon Monoxide
Ensure proper ventilation by installing and maintaining vents as per Rinnai manuals. Regularly inspect and clean vents to prevent blockages. Schedule professional servicing to check for leaks or combustion issues. Never operate the heater in poorly ventilated areas, as this can lead to carbon monoxide buildup. Always follow installation and maintenance guidelines to ensure safe operation.
Ensuring Proper Ventilation
Proper ventilation is crucial for safe and efficient operation of old Rinnai gas heaters. Always install vents according to the manual’s specifications and ensure they remain unobstructed. Regularly inspect and clean vents to avoid blockages. Proper airflow prevents gas buildup and ensures optimal performance. Refer to the manual for specific venting requirements and maintenance tips to maintain a safe and efficient heating system.
Converting Gas Types
Converting old Rinnai gas heaters between natural gas and propane requires a licensed professional. Use only Rinnai-approved conversion kits and follow manual instructions to ensure safety and compliance.
Switching Between Gas Types
Switching between natural gas and propane on old Rinnai heaters requires a licensed professional. Use only Rinnai-approved conversion kits and follow the manual’s detailed instructions to ensure safety and proper function. This process involves adjusting the gas valve, verifying venting compatibility, and checking local regulations to prevent hazards like carbon monoxide issues.
Model-Specific Instructions
Old Rinnai models like RHFE-309FT and RHFE-559FT require adherence to their specific manuals for installation and operation, ensuring safety and optimal performance tailored to each unit’s design;
Popular Old Models
Popular old Rinnai gas heater models include the RHFE-309FT, RHFE-559FT, and RHFE-561FT, known for their durability and energy efficiency. These models, part of the Energysaver series, were widely used for space heating. The Enduro 13 model, specific to Australia, also gained popularity. Each model has unique installation and operational requirements, detailed in their respective manuals, ensuring safe and effective performance.
Energy Efficiency Tips
Ensure proper installation, regular maintenance, and use of programmable thermostats to optimize energy use. Clean filters and inspect vents regularly to maintain efficiency and safety standards.
Optimizing Heater Usage
For optimal performance, ensure proper installation and regular maintenance. Adjust heat output using the remote control and consider programmable thermostats. Monitor heater performance through status indicators and maintain clean filters. Seal drafts to prevent heat loss and clean vents regularly. Using zone heating and energy-saving modes can enhance efficiency, ensuring reliable and economical operation.
Accessing User Manuals
Download Rinnai gas heater manuals for free from the official Rinnai website or authorized dealers. Models like RHFE-309FT have dedicated operation guides for easy access.
Downloading Manuals Online
Rinnai gas heater manuals are easily accessible online. Visit the official Rinnai website or platforms like ManualsLib to download PDF versions for models like RHFE-309FT and ES38. These manuals provide detailed installation, operation, and maintenance instructions. Ensure to follow the guidelines for safe and efficient heater operation. Always use official sources to avoid incorrect or outdated information.
Product Registration
Register your Rinnai gas heater at www.rinnairegistration.com or call 1-866-RINNAI1. Registration ensures warranty benefits and provides access to exclusive support and updates. Follow manual instructions carefully.
Benefits and Process
Registering your old Rinnai gas heater ensures warranty validation, access to exclusive support, and important updates. Visit www.rinnairegistration.com or call 1-866-RINNAI1. The process is straightforward, requiring basic product details. Registration ensures compliance with safety guidelines and maintains optimal performance. It also provides a record of ownership for future servicing and potential warranty claims, ensuring your heater operates safely and efficiently for years to come.
Remote Control Setup
Pairing the remote control with your old Rinnai gas heater ensures seamless operation. Follow the manual’s pairing instructions for a hassle-free setup and convenient temperature control.
Pairing and Programming
To pair the remote control with your old Rinnai gas heater, ensure both devices are powered on. Press and hold the pairing button on the remote until the LED flashes red, indicating pairing mode. Point the remote at the heater’s receiver window and wait for the LED to stop flashing, confirming the connection. Programming involves setting temperature ranges and timers using the manual’s instructions for menu navigation. Resetting the remote, if needed, can be done by holding the ‘SET’ button for ten seconds, then repeating the pairing process for reconnection. This ensures convenient and customized heater operation.

Venting and Clearance
Proper venting ensures safe operation, while maintaining clearance from flammable materials prevents fire hazards. Always follow Rinnai’s guidelines for venting and clearance to ensure safety and efficiency.
Proper Venting Practices
Proper venting is crucial for safe and efficient operation of old Rinnai gas heaters. Ensure vent pipes are correctly sized, installed, and terminate outside as per local building codes. Use only certified venting components to prevent gas leaks. Regular inspections by professionals are recommended to maintain efficiency and safety, ensuring compliance with manufacturer guidelines and regulations.
Clearance Requirements
Proper clearance around old Rinnai gas heaters is essential for safety and efficiency. Maintain at least 3 feet of clearance from flammable materials. Ensure the heater is installed in a well-ventilated area, adhering to local building codes and manufacturer guidelines. Regularly inspect the surrounding space to ensure no obstructions interfere with airflow or operation, as specified in Rinnai’s installation manuals.
Legacy Models
Old Rinnai gas heaters, such as the RHFE-309FT and RHFE-559FT, are known for their reliability and efficiency. These legacy models are supported by detailed manuals for installation and operation, ensuring continued performance and safety over the years.
Specific Considerations
Old Rinnai gas heaters, like the RHFE-309FT, require adherence to original installation manuals for compatibility with modern systems. Regular maintenance, such as filter cleaning and gas line inspections, is crucial. Ensure models are converted between gas types only with Rinnai-approved kits. Always consult professional technicians for legacy models to avoid safety risks and ensure optimal performance over time.
Handling Discontinued Parts
For old Rinnai gas heaters, discontinued parts may require alternative solutions. Check compatibility with current models like RHFE-309FT and RHFE-559FT. Contact Rinnai support for assistance.
Alternative Solutions
When dealing with discontinued parts for old Rinnai gas heaters, consider third-party suppliers or refurbished components. Ensure compatibility by consulting Rinnai’s official documentation. Upgrading to newer models like RHFE-309FT or RHFE-559FT may also be necessary. Always verify safety standards and compatibility before installing any alternative parts to maintain efficiency and functionality.
DIY vs Professional Repair
Minor issues like filter cleaning can be handled DIY, but complex repairs require licensed professionals to ensure safety and compliance with Rinnai’s installation standards.
When to DIY
Simple tasks like cleaning filters, checking for loose connections, and ensuring proper ventilation can be safely handled by homeowners. Always consult the manual for specific guidance and safety tips to avoid complications. DIY is ideal for minor maintenance that doesn’t involve complex repairs or gas line adjustments.
When to Call a Professional
For complex repairs, gas line adjustments, or venting issues, always contact a licensed professional. They ensure safety and compliance with local regulations. If error codes persist or major components fail, professional servicing is essential to maintain efficiency and warranty validity. DIY attempts in such cases can lead to hazards or void manufacturer warranties.
 old rinnai gas heater instructions
  cool breeze air conditioner manual
  manual canon powershot sx60 hs
  goldilocks and the three bears pdf
  arlec 2200w glass panel heater manual troubleshooting
  libro teología del cuerpo juan pablo ii pdf
  east texas planting guide 2024
  bio bidet bb 2000 manual
  playground aron beauregard read online free pdf