This manual provides essential information for understanding and operating the Brother 2125 Sewing Machine, ensuring safe and effective use. It covers key features, setup, and troubleshooting.
1.1 Overview of the Brother 2125 Sewing Machine
The Brother 2125 Sewing Machine is designed for household use, offering versatility for various sewing projects. It features multiple stitch patterns and accessories for enhanced functionality. The machine is user-friendly, making it suitable for both beginners and experienced sewers. Always refer to the manual for proper usage and maintenance tips.
1.2 Importance of Reading the Manual
Reading the Brother 2125 manual is crucial for understanding safety guidelines, proper operation, and troubleshooting. It provides essential tips for maintaining the machine and ensuring optimal performance. Following the manual’s instructions helps prevent accidents and extends the machine’s lifespan. Always refer to it for manufacturer-recommended practices and to avoid potential damage or malfunctions.
1.3 Key Features of the Brother 2125 Sewing Machine
The Brother 2125 Sewing Machine offers a variety of stitch patterns, automatic threading, and adjustable tension control. It includes a free-arm design, multiple presser feet, and a built-in needle threader. The machine is lightweight, durable, and designed for both beginners and experienced sewers, making it versatile for household and crafting projects.
Safety Precautions and Guidelines
Always follow the manual’s safety guidelines to prevent accidents. Use only recommended accessories and avoid operating the machine if damaged. This ensures safe and reliable performance.
2.1 General Safety Tips for Sewing Machine Usage
Always follow the guidelines in the Brother 2125 manual. Use only recommended accessories and avoid damaged cords or plugs. Keep children away and ensure proper ventilation. This ensures safe and reliable operation of the Brother 2125 sewing machine.
2.2 Warnings and Cautions from the Manual
Always follow the warnings in the Brother 2125 sewing machine manual. Use only recommended accessories and avoid operating the machine with a damaged cord or plug. Never leave the machine unattended while in use, and ensure proper ventilation. These precautions help prevent accidents and ensure safe, reliable operation of your sewing machine.
2.3 Proper Handling and Storage of the Machine
Handle the Brother 2125 sewing machine with care to maintain its performance. Store it in a dry, cool place away from direct sunlight. Use the provided dust cover to protect it from dust. Avoid exposing the machine to extreme temperatures or moisture. Regular cleaning and proper storage ensure longevity and optimal functionality of your sewing machine.

Parts and Accessories of the Brother 2125
The Brother 2125 sewing machine includes essential components like the needle, bobbin, and presser foot. Accessories such as extra needles, bobbins, and stitch patterns enhance its functionality.
3.1 Basic Components of the Sewing Machine
The Brother 2125 features a sturdy build with essential components like the needle bar, bobbin case, and presser foot. The machine includes a spool pin, stitch selectors, and a free-arm design for versatile sewing. These parts work together to ensure smooth stitching and easy operation for various fabric types and projects.
3.2 Recommended Accessories for Optimal Performance
For optimal performance, use Brother-recommended accessories like extension tables, hoops, and specialized presser feet. These enhance functionality for tasks such as quilting or embroidery. Additional parts, including spool pins and bobbin cases, are available to maintain and upgrade your machine, ensuring longevity and versatility in your sewing projects.
3.3 Understanding the Parts Reference List
The parts reference list in the Brother 2125 manual provides a detailed catalog of components, numbered for easy identification. This section includes images and descriptions to help users recognize and locate parts, ensuring proper maintenance and replacement. Referencing this list is essential for ordering correct replacements or understanding the machine’s assembly and functionality.
Threading and Setting Up the Machine
Learn how to properly thread the Brother 2125 and set it up for first use. This section guides you through initial tension adjustments and preparation for stitching.
4.1 Step-by-Step Threading Guide
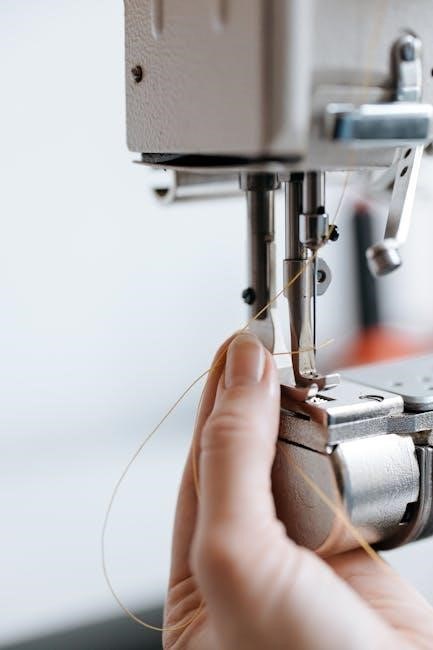
Start by raising the needle to its highest position. Carefully guide the thread through the machine’s tension discs, ensuring it’s seated properly. Next, pass the thread through the take-up lever and insert it into the needle’s eye. Gently pull the thread to remove any slack. Test the tension by gently tugging the thread. If it resists slightly, the tension is correct. Finally, trim excess thread close to the needle to avoid loose ends. Proper threading ensures smooth stitching and prevents machine jams.
4.2 Setting Up the Machine for First Use
Place the machine on a stable, flat surface and plug in the power cord. Ensure the power switch is off. Attach the presser foot and insert the needle correctly. Follow the threading guide for proper thread setup. Turn on the machine and test stitch on scrap fabric to ensure everything functions correctly.
4.3 Adjusting Tension and Other Initial Settings
Ensure proper tension by following the manual’s threading guide. Adjust the bobbin tension as needed for balanced stitching. Test on scrap fabric to verify settings. If issues arise, consult the troubleshooting section. Refer to the parts list for clarity on adjusting mechanisms. Proper initial settings guarantee smooth operation and consistent stitch quality.
Operating the Brother 2125 Sewing Machine
Start by turning on the machine and selecting the desired stitch pattern. Guide fabric smoothly under the presser foot, maintaining steady control for consistent stitching results.
5.1 Starting the Machine and Basic Stitching
Turn on the machine using the power switch. Select the straight stitch pattern for basic sewing. Insert the needle correctly and thread the machine as per the manual. Place fabric under the presser foot, aligning edges. Start sewing at a steady pace, using the foot pedal for control. Always test stitches on scrap fabric before sewing actual projects. Regularly oil the machine to ensure smooth operation.
5.2 Selecting and Using Different Stitch Patterns
Select the desired stitch pattern using the dial or button on the machine. Choose from options like straight stitch, zigzag, or decorative patterns. Adjust stitch length and width as needed. Use the presser foot appropriate for the stitch type. Test stitches on scrap fabric before sewing actual projects. This ensures proper tension and alignment for optimal results.
5.3 Using the Presser Foot and Other Attachments
Attach the presser foot by aligning it with the shank and securing it firmly. Use the zigzag foot for decorative stitches and the buttonhole foot for precise buttonholes. Explore other attachments for specialized tasks. Always attach and detach carefully to maintain machine performance and ensure safe operation for optimal results.
Troubleshooting Common Issues
Identify and resolve common problems like thread breaking or skipped stitches. Regular maintenance and proper setup can prevent malfunctions, ensuring smooth operation and extending machine life.
6.1 Common Problems and Their Solutions
Common issues include thread breaking, skipped stitches, or improper threading. Solutions involve checking thread tension, cleaning debris, and ensuring correct needle alignment. Regular maintenance and following manual guidelines can prevent these problems, ensuring optimal performance and extending the machine’s lifespan effectively.
6.2 Maintenance Tips to Prevent Machine Malfunctions
Regularly clean dust and debris from the machine, oil moving parts, and inspect for wear. Replace worn needles and check thread tension. Store the machine in a dry place and avoid extreme temperatures. Follow the manual’s maintenance schedule to ensure smooth operation and prevent mechanical issues over time.
6.3 Resetting the Machine to Factory Settings
To reset the Brother 2125 to factory settings, turn off the machine, locate the reset button, and press and hold it for 3-5 seconds. Release and turn it back on. This restores default settings, resolving software glitches. Always refer to the manual for specific reset button locations and additional instructions.
Accessories and Optional Parts
Explore a variety of optional parts and accessories designed for the Brother 2125, including presser feet, extension tables, and embroidery hoops, to enhance sewing capabilities.
7.1 Available Accessories for Enhanced Functionality
The Brother 2125 supports various accessories like presser feet, extension tables, and embroidery hoops to expand its capabilities. Additional parts such as spool pins, scissors, and notions are also available for enhanced sewing performance and convenience.
- Presser feet for specialized stitching
- Extension tables for larger projects
- Embroidery hoops for decorative stitching
- Spool pins and sewing notions
7.2 Upgrading Your Sewing Machine with Additional Parts
Upgrading your Brother 2125 sewing machine with additional parts can enhance its functionality. Consider adding specialized presser feet, custom stitch plates, or upgraded tension discs. Brother ensures performance parts remain available for at least 8 years post-discontinuation. Always refer to the manual for compatibility and installation guidelines.
- Specialized presser feet
- Custom stitch plates
- Upgraded tension discs
7.3 Compatibility of Brother 2125 with Other Accessories
The Brother 2125 sewing machine is compatible with a variety of accessories to enhance its functionality. Brother ensures performance parts remain available for at least 8 years after discontinuation. Use only recommended accessories to maintain optimal performance and safety. Compatibility details can be found in the manual or through Brother’s official support channels.
- Presser feet
- Stitch plates
- Tension discs
Downloading and Using the Manual
The Brother 2125 sewing machine manual is available for free download in PDF format. Ensure Adobe Acrobat Reader is installed for viewing. Always use the official Brother website or trusted sources to download the manual for authenticity and safety.
- Download from Brother’s official website.
- Use Adobe Acrobat Reader for viewing.
- Ensure the manual is compatible with your machine model.
8.1 Sources to Download the Brother 2125 Manual
The Brother 2125 manual can be downloaded from Brother’s official website, ensuring authenticity and safety. Additional trusted sources include authorized Brother retailers and reputable third-party sites like ManualsLib or ManualsOnline. Always verify the source for security. The manual is available in PDF format, requiring Adobe Acrobat Reader for viewing.
- Brother’s official website.
- Authorized Brother retailers.
- Trusted third-party sites (e.g., ManualsLib, ManualsOnline).
8.2 Navigating the PDF Document
The Brother 2125 manual is provided in PDF format, allowing easy navigation. Use bookmarks to jump to specific sections quickly. The table of contents is interactive, with hyperlinks to relevant pages. Utilize the search function to find keywords or topics instantly. Zoom tools enable clear viewing of diagrams and small text. Print specific pages for convenience.
- Use bookmarks for quick access.
- Interactive table of contents.
- Search function for keywords.
8.3 Printing and Saving the Manual for Future Reference
The Brother 2125 manual can be printed or saved as a PDF for easy access. Use Adobe Acrobat Reader to view and print specific pages. Ensure high-quality printing for clear instructions. Save the document to your device or cloud storage for future reference, and consider organizing it in a dedicated folder for quick retrieval.
- Print specific pages as needed.
- Save the PDF to your device.
- Organize files for easy access.
Regular Maintenance and Care
Regular maintenance ensures optimal performance. Clean the machine, lubricate moving parts, and inspect for wear. Refer to the manual for detailed cleaning and lubrication instructions.
9.1 Cleaning the Machine and Its Parts
Regularly clean the Brother 2125 sewing machine to maintain performance. Use a soft brush to remove dust and lint from the bobbin area and tension discs. Gently wipe the exterior with a clean, dry cloth. Avoid harsh chemicals. Refer to the manual for detailed cleaning instructions to ensure longevity and smooth operation.
9.2 Lubricating the Machine for Smooth Operation
Lubricate the Brother 2125 sewing machine regularly to ensure smooth operation. Use high-quality sewing machine oil on moving parts, such as the needle bar and shuttle hook. Avoid over-lubrication to prevent dust buildup. Refer to the manual for specific lubrication points and frequency recommendations to maintain optimal performance and extend the machine’s lifespan.
9.3 Checking for Wear and Tear
Regularly inspect the Brother 2125 sewing machine for wear and tear. Check the needle, bobbin area, and presser foot for damage or excessive wear. Look for frayed belts, loose screws, or misaligned parts. Replace worn components promptly to prevent further damage. Clean and lubricate moving parts to maintain smooth operation and extend the machine’s lifespan.

Warranty and Customer Support
The Brother 2125 sewing machine comes with a warranty ensuring coverage for parts and labor. Contact customer support for inquiries or repairs. Locate authorized service centers for professional assistance. Additionally, user manuals and performance parts are available for download, providing comprehensive support during ownership.
10.1 Understanding the Warranty Coverage
The Brother 2125 sewing machine is backed by a comprehensive warranty covering parts and labor for a specified period. This warranty ensures repairs or replacements for manufacturing defects, excluding damages from misuse or unauthorized modifications. Details are outlined in the manual, providing assurance for optimal performance and user satisfaction.
10.2 Contacting Brother Customer Service
Brother provides dedicated customer support for inquiries and assistance. Users can contact the service team via phone, email, or through the official website. The support team is available to address questions, troubleshooting, and warranty-related issues, ensuring prompt resolution and maintaining customer satisfaction with the Brother 2125 sewing machine.
10.3 Finding Authorized Service Centers
Authorized Brother service centers can be located through the official Brother website or by contacting customer support. Enter your zip code on the Brother website to find nearby centers. These centers provide genuine parts and expert repairs, ensuring your machine operates optimally under warranty and beyond.
Mastering the Brother 2125 sewing machine requires practice and adherence to the manual. Always follow safety guidelines and maintain your machine for optimal performance and longevity.
11.1 Summary of Key Points
The Brother 2125 sewing machine manual serves as a comprehensive guide, covering safety, setup, operation, and maintenance. It emphasizes proper threading, stitch selection, and troubleshooting for optimal performance. Regular maintenance and referencing the manual ensure longevity and functionality, making it an indispensable resource for users of all skill levels.
11.2 Encouragement to Start Sewing with Confidence
With the Brother 2125 manual as your guide, you’re empowered to sew with confidence. Start exploring its features, from basic stitches to advanced techniques. Whether you’re a beginner or experienced, this machine’s user-friendly design and versatility will inspire creativity. Embrace sewing as a hobby or craft, knowing you have comprehensive support every step of the way.
11.3 Importance of Referencing the Manual Regularly
Regularly consulting the Brother 2125 manual ensures optimal performance and prevents errors. It provides updated tips, troubleshooting solutions, and maintenance advice. By referencing the manual, you’ll maintain your machine’s efficiency, extend its lifespan, and enhance your sewing experience. Keep it handy for quick guidance and to stay informed about best practices for your sewing projects.
 samsung refrigerator rs261mdrs manual
  nobles ss5 parts manual
  eaton endurant troubleshooting manual
  lrsos2706s manual
  navy correspondence manual pdf
  powersmart 209cc lawn mower manual
  what stock trade in conjunction with qqq options pdf
  lifebreath digital wall control manual
  the very hungry caterpillar printables pdf free
  ged social studies practice test pdf