
The Honeywell T6 Pro Thermostat is a programmable, smart home device designed for efficient temperature control. It offers remote access, scheduling, and compatibility with multi-stage systems for optimal comfort.

Installation Guide

To install the Honeywell T6 Pro Thermostat, start by turning off power to your HVAC system. Remove the old thermostat, label the wires, and mount the new base. Connect the wires to the corresponding terminals, attach the display, and restore power.
Before installing the Honeywell T6 Pro Thermostat, ensure your HVAC system is compatible. Turn off the power supply at the circuit breaker. Remove the old thermostat and label each wire with its function (e.g., R, W, Y, G). Take photos or notes to reference during installation. Open the packaging and verify all components are included. If your system lacks a C-wire, a C-wire adapter may be necessary. Ensure the wall is level and mark the mounting plate position. Drill pilot holes if necessary and insert wall anchors. Proceed with mounting the base plate and connecting the wires according to the manual. This preparation ensures a smooth installation process and proper thermostat functionality. Mount the Universal Wall Plate (UWP) on the wall, ensuring it is level. Mark the hole positions and drill pilot holes if necessary. Insert wall anchors and secure the UWP. Connect the wires to the corresponding terminals on the UWP, matching the labels from your old thermostat (e.g., R, W, Y, G, C, O/B). Attach the thermostat display to the UWP, snapping it into place. Ensure all wires are securely connected and properly routed. Restore power to the system and test the thermostat to confirm it powers on. If your system lacks a C-wire, use the provided adapter to ensure proper functionality. Double-check all connections for accuracy to avoid malfunctions. This step ensures the thermostat is correctly installed and ready for programming. The Honeywell T6 Pro features programmable scheduling, a touch screen display, Wi-Fi for remote access, energy-saving modes, and compatibility with multi-stage systems. It integrates with mobile apps and has a backlit display for easy use. The Honeywell T6 Pro features a high-resolution, backlit display that provides clear visibility in any lighting condition. The touchscreen interface allows for intuitive navigation, enabling users to adjust settings effortlessly. The display is responsive, ensuring smooth transitions between menus; Controls include a center button for selection and up/down arrows for temperature adjustments. Users can lock the keypad to prevent unauthorized changes, enhancing security. The display also offers brightness settings, which can be adjusted for optimal viewing comfort. Additionally, it provides reminders for battery replacement and air filter changes, ensuring system efficiency and longevity. The T6 Pro’s display and controls are designed for user convenience, combining functionality with ease of use. The Honeywell T6 Pro Thermostat features an intuitive menu system, accessed via the touchscreen interface. Pressing the center button reveals the main menu, which includes options for System Mode, Temperature Settings, Scheduling, and Maintenance. The menu is designed for ease of navigation, with clear labels and visual cues to guide users. Submenus allow for detailed adjustments, such as setting temperature ranges for heating and cooling or configuring weekly schedules. The thermostat also offers advanced features like fan operation settings and air filter reminders. Navigation is streamlined, ensuring users can quickly access and modify settings without confusion. The menu’s logical structure and responsiveness make it user-friendly, even for those unfamiliar with smart thermostats. This design ensures seamless control over home climate comfort. The T6 Pro allows easy scheduling and temperature adjustments, enabling users to customize comfort settings. Program schedules and adjust temperatures effortlessly for optimal energy efficiency and convenience;
Creating a schedule on the Honeywell T6 Pro Thermostat is straightforward and intuitive. Start by accessing the menu, then navigate to the scheduling section. Choose the desired days and set specific temperatures for different times. For example, set a lower temperature during sleep hours or when the house is unoccupied to save energy. Use the up and down arrows to adjust temperatures and the Select button to confirm changes. The thermostat allows you to program up to four periods per day, ensuring your home remains comfortable while optimizing energy usage. Schedules can be customized for weekdays and weekends, providing flexibility to match your lifestyle. Once programmed, the thermostat will automatically adjust temperatures according to your settings, enhancing both convenience and efficiency. To adjust temperature settings on the Honeywell T6 Pro Thermostat, start by ensuring the device is unlocked. Press the CENTER button and enter the password (default is 1234) using the up or down arrows to change digits, then press Select. Once unlocked, use the up and down arrows to increase or decrease the desired temperature. Temporary adjustments will override the current schedule until the next programmed period begins. For permanent changes, navigate to the temperature settings menu and adjust the setpoints for heating and cooling modes. You can also modify temperature holds or reset to factory defaults if needed. The thermostat’s intuitive interface allows for seamless adjustments, ensuring your home remains at your preferred comfort level. Regularly reviewing and updating temperature settings can help optimize energy efficiency and performance. If your Honeywell T6 Pro Thermostat isn’t functioning properly, start by checking the power supply. Ensure the circuit breaker isn’t tripped and batteries (if applicable) are charged. Common issues include the thermostat not turning on, incorrect temperature readings, or unresponsive controls. For display problems, restart the device by removing batteries or resetting the circuit breaker. If the thermostat isn’t cooling or heating, verify wiring connections and ensure the system switch matches your equipment (e.g., heat or cool mode). If issues persist, consult the user manual or contact Honeywell support for assistance. Regular maintenance and updates can prevent many common problems. Regular maintenance ensures your Honeywell T6 Pro Thermostat operates efficiently and extends its lifespan. First, clean the display and sensors with a soft cloth to prevent dust buildup. Replace batteries annually or as indicated by low-battery alerts. Check wiring connections for looseness or damage and secure them if necessary. Update firmware via the Honeywell app to access new features and bug fixes. Schedule annual HVAC system checks with a professional to ensure compatibility and optimal performance. Proper care ensures accurate temperature control and energy savings. The Honeywell T6 Pro Thermostat is backed by a limited warranty covering parts and labor for up to 5 years, depending on the component. The warranty ensures defect-free materials and workmanship under normal use. For support, Honeywell offers online resources, including user manuals, troubleshooting guides, and FAQs. Customers can also contact Honeywell’s customer service team via phone, email, or live chat for assistance. Additional resources: Register your product on Honeywell’s website to validate your warranty and receive updates. For detailed warranty terms, refer to the official Honeywell T6 Pro manual or contact their support team directly.2.1. Preparing for Installation
2.2. Wiring and Mounting

Key Features of the T6 Pro

3.1. Display and Controls
3;2. Navigation and Menu Options

Programming Your T6 Pro Thermostat
4.1. Creating a Schedule

4.2. Adjusting Temperature Settings

Troubleshooting Common Issues

Maintenance Tips

Warranty and Support Information
– Online Support Center: Access tutorials, manuals, and troubleshooting tips.
– Replacement Information: Guidelines for replacing or upgrading your thermostat.
 samsung refrigerator rs261mdrs manual
  nobles ss5 parts manual
  eaton endurant troubleshooting manual
  lrsos2706s manual
  navy correspondence manual pdf
  powersmart 209cc lawn mower manual
  what stock trade in conjunction with qqq options pdf
 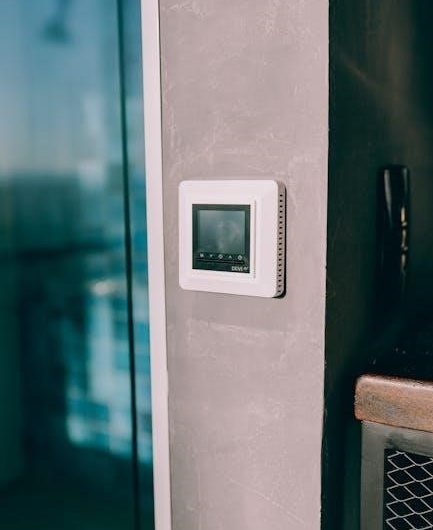 lifebreath digital wall control manual
  the very hungry caterpillar printables pdf free
  ged social studies practice test pdf